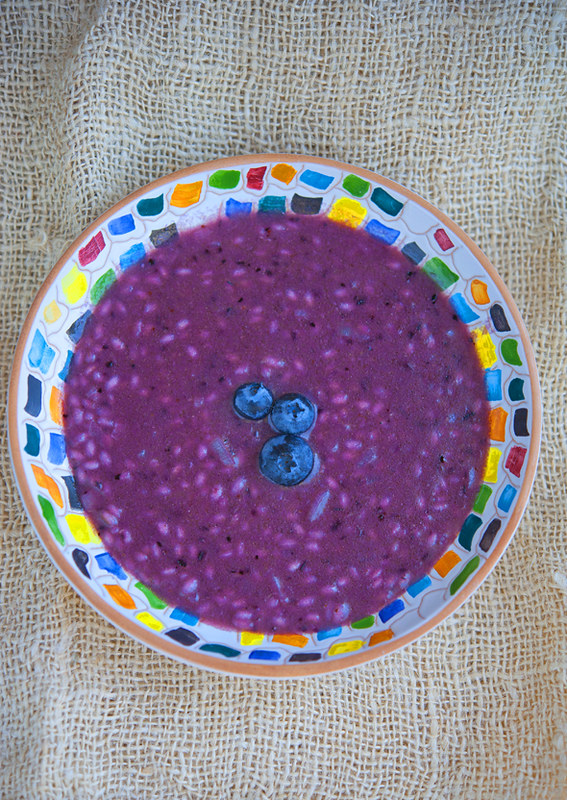
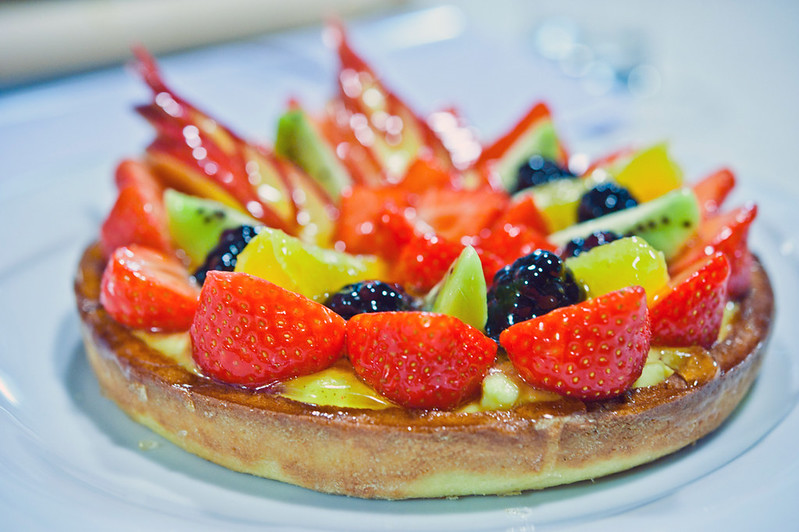
My blog has moved!

You will be automatically redirected to the new address. If that does not occur, visit
http://christiescorner.com
and update your bookmarks.

Friday, October 02, 2009

Green Tomato Marmalade

Green-Tomato-Marmalade-1.jpg

Despite the amber hue of the resulting preserves, this is green tomato marmalade. And no, I didn't use the teeny-tiny yellow tomatoes on the left. They're just there for show.

Instead, I used small to mid-sized green tomatoes like the ones below. I figured since I could leave the skin on, I'd use tomatoes that would require peeling when ripe. Just because I take the time to make my own marmalade doesn't mean I can't be lazy about some things.

Green-Tomato-Marmalade-2.jpg

With my dining room window sill loaded with green tomatoes and lot of of blogger buzz about tomato jam, I thought I'd try a batch of green tomato preserves. Besides, I'm too impatient to wait for them to ripen.

During my research, none of the recipes I found called for pectin. But they all required ridiculously long cooking times. One variation would have taken me six hours if I'd followed their advice. (2 hours to cook, 2 hours to cool, 2 more hours of cooking. Are they crazy?)

I settled on two hours — total. I figured this was the amount of time it would take to watch a movie on DVD. I'd just pop in on things occasionally to avoid writing another "Kitchen Disaster" post. In reality, it was the amount of time it took to prep, cook, eat, makes notes about and clean up the Fried Green Tomato Parmesan I was making at the same time.

Despite my improvisation, the marmalade cooked up nicely. Things would have gone even better if someone had mentioned that you should cut the green tomatoes into small chunks. I knew they hold their shape from my Parmesan dish, but even when boiled like a witches brew these little green monsters don't break down. Of course I didn't take their freakishly firm structural integrity into account when I quartered the tomatoes. My solution? Pureeing the chunks into submission with an immersion blender.

The resulting marmalade has a citrusy tang but isn't sickly sweet. To my delight, it holds together much better than my liquid ketchup. While it freed up a good half-foot of window sill, I'm now running out of cupboard space. Guess I'll have to host a tea party to use up all my butterscotch peach jam and green tomato marmalade. The runny tomato and peach ketchup is reserved for chicken.

What's your opinion on marmalade? Do you have a favourite flavour?


Green-Tomato-Marmalade-3.jpg

Green Tomato Marmalade
Printable recipe

Makes 5 to 6 250 mL jars

Ingredients

  • 2 oranges
  • 1 lemon
  • 1 cup water
  • 4 pounds (about 9 cups) green tomatoes, cut in small pieces
  • 5 cups sugar
  • 1/4 cup crystallized ginger, minced

Instructions

  1. Using a vegetable peeler, remove the rind from the oranges and lemon, being careful not to remove any of the pith. Sliver the rind. Set aside.
  2. Remove the pulp from the orange and lemon. Set aside.
  3. In a small saucepan, boil the slivered rind in 1 cup water for 5 minutes. Drain and rinse.
  4. Core the green tomatoes. Cut them into small pieces. Make sure these pieces are the size you want in your jam.
  5. Place the citrus rind and pulp, green tomatoes, sugar and ginger in a large pot. Bring to a boil and boil uncovered for 2 hours or until the jam thickens.
  6. Meanwhile, prepare the preserving jars.
  7. Fill jars with hot marmalade, leaving a 1/4 inch head pace. Wipe the rims clean. Seal according to manufacturer's directions.
  8. Process the jars in a boiling water bath for 10 minutes.

Thursday, October 01, 2009

Two Quick and Easy Apple Recipes

It's been quite the week. Over the weekend I co-hosted a 24-hour playwriting contest for the playwright development centre I'm involved with. While my co-host and I ensured the entrants never ran out of coffee or junk food, a dozen writers pounded out scripts on laptops in the Rotunda of Kitchener City Hall — under the watchful eye of a gigantic inflated dung beetle. Really.

You just can't make this stuff up.

Sleep-deprived, I worked on the soon-to-launch WordPress site and inadvertently imported two years' worth of posts from a totally unrelated blog. In case you were wondering. Yes, it does take a long time to find and delete 200 entries.

But after it was all done, I took solace in one of my favourite comfort foods. Apples.

And today, I'm thrilled to be talking about this versatile fruit on CTV in Kitchener. If you live between Owen Sound and Windsor, I'm on at noon. And yes, I'm taller in person.

I'll be covering a couple of quick and delicious recipes. First up is the classic and oh-so-simple baked apple. Notice how it wears its cinnamon stick at a jaunty angle.

Baked-Apple.jpg

And then I move onto the elegant but easy single-serving apple crisp. Or is it crumble? Or Betty?

Apple-Crisp-Creme-Fraiche.jpg

No matter what you call it, it's tasty. Especially when topped with a dollop of creme fraiche and a swirl of maple syrup.

I'm told I'll have six minutes, so in case I run out of time, here are the recipes I plan to cover.

Apple season's just begun. If peaches and tomatoes are anything to go on, you know I can be obsessive. So tell me. How do you like your apples?

Simple Baked Apples

Printable recipe

Ingredients

  • 1 baking apple per person (Cortland, Northern Spy, Ida Red)
  • cinnamon sticks
  • maple syrup (optional)
  • dot of butter (optional)

Instructions

  1. Preheat oven to 350°F.
  2. Wash and core the apples.
  3. Place in a baking dish so they aren't touching.
  4. Put a sliver of cinnamon in the hole. If you like, add a dot of butter or 1 tbsp maple syrup.
  5. Bake until soft, about 25 to 40 minutes depending on the size of the apple.


Individual Apple Crumbles

Printable recipe

Ingredients

Crumble Topping

  • 1 cup all-purpose flour
  • 1 cup large flake oats (or rolled oats, not instant or minute)
  • 3/4 cup brown sugar, lightly packed
  • 1/2 tsp cinnamon
  • 1/4 tsp nutmeg
  • 1/2 cup butter, cold, in chunks

Filling

  • 1 apple per person (Cortland, Northern Spy, Ida Red)
  • cinnamon
  • nutmeg

Instructions

  1. Sift the dry topping ingredients together.
  2. Cut in cold butter until it resembles small peas.
  3. Preheat oven to 350°F.
  4. Wash, peel, core and chop the apples.
  5. Toss apple pieces with a sprinkling of cinnamon and nutmeg, if desired.
  6. Fill each single-serving, oven-proof dish with 1 apple's worth of pieces.
  7. Sprinkle crumble over the apples. (Any leftover crumble topping can be frozen until next time).
  8. Bake 30 minutes or until crumbs are golden brown and the apples are bubbling.
  9. Serve warm.

Tuesday, September 29, 2009

Fried Green Tomato Parmesan

Tomatoes-Ripening.jpg

The deed is done. I have picked all the tomatoes, uprooted the plants and put the garden to bed.

I'd like to think the tomatoes didn't want to go any more than I wanted to remove them. I had ambitious plans to deal with the garden on Sunday. But it was unseasonably hot and muggy. After picking just one fist-sized bright red tomato I decided to give the green ones another day to ripen. But Monday blustered in with a thunder storm and wind. Every time I went to complete the unpleasant task, the skies opened just as I reached the tomato patch. Was this a sign?

Cold, grumpy and sad to see my perpetual tomato supply gone, I finished the job Monday evening as the sky turned dark as my mood.

But things are looking up. In the light of day I now see I have lots of tomatoes to play with — 10-feet of window sills worth, all in various stages of ripeness. Some are ready to eat now, or will be in a few days. Others are green and hard as an apple.

There are green, red and yellow...

Tomatoes-Green-Red-Yellow.jpg

Big as an orange. Small as a grape.

Tiny-Tomatoes.jpg

Knowing many of the green tomatoes won't ripen, I decided to try a classic Southern recipe. One I'd only heard of but never tried — Fried Green Tomatoes.

So, I made a classic, pan-fried version. Dip. Bread. Fry.

The results were tart and tangy, but to my mind needed something. All that dipping and frying reminded me of the Eggplant and Chicken Puttanesca Stacks I made for the Almost Meatless potluck. So, I decided to wing things and make a Fried Green Tomato Parmesan.

The resulting Parmesan was tangier than the eggplant version and had a firmer texture. Unlike eggplant or ripe tomatoes, green tomatoes don't break down very much during cooking, so they are a bit more like meat. Andrew, who is no friend of eggplant, preferred this variation. "It was more in keeping with what I like," said my non-taster, veggie-phobic husband.

Have a bunch of green tomatoes on hand? Fry 'em up. If you like them as is, eat them as a side dish. If they don't appeal, make them into Parmesan. Either way, they use up those extra tomatoes no one seems to know what to do with north of the border.

How do you use your green tomatoes? Are they compost or do you turn them into a seasonal treat?


Fried-Green-Tomato-Parmesan.jpg

Fried Green Tomato Parmesan
Printable Recipe

Makes 4 servings

Ingredients

  • 3 to 4 firm medium to large green tomatoes, cored
  • salt
  • fresh ground black pepper
  • 1/3 cup milk
  • 1/3 cup flour
  • 1 large egg, beaten
  • 1 cup dried bread crumbs (or Panko)
  • olive or canola oil
  • 2 cups tomato sauce (homemade or good quality store bought)
  • 1 cup freshly grated Parmigiano-Reggiano

Instructions

  1. Slice tomatoes 1/2 inch thick. Sprinkle lightly with salt and pepper.
  2. Heat oil in a large skillet on medium-high. Preheat oven to 350°F.
  3. Bread the tomato slices by dipping them into the coating ingredients in the following order: milk, flour, egg, bread crumbs.
  4. Fry each slice for 4 to 5 minutes per side. When done, place in a single layer to cover the bottom of a 9" x 13" oven-proof pan.
  5. Cover with tomato sauce.
  6. Sprinkle with parmesan.
  7. Bake for 45 to 60 minutes or until the tomatoes are done to your liking.
  8. Serve on pasta.

Friday, September 25, 2009

Beginnings and Endings

Tomatoes-On-Vine.jpg

I'm sad. Come Monday my tomato plants will be gone. The season is over. Frost is on the way and after one final weekend of harvest, I have to uproot these beauties, clear away any fallen fruit and put the patch to bed for the winter. I know. They're just tomato plants. But still, I'm sad.  

I'll miss my daily trips to the tomato patch. I had expected to love the tomatoes, but found I enjoyed the actual process of growing my own food as much as the delicious results. I got a kick out of trying to guess when a certain tomato would be ready to pick and never knew what I'd find when I got there. Despite daily inspections, sometimes I'd find a huge red tomato hiding under the leaves. How'd I miss that? And how did the sun reached it?

And on Monday it all ends.

I know. Thousands, if not millions, of people grow tomatoes. Probably bigger and better ones than I do. Somehow, they find the inner strength NOT to run to the computer and write about their nightshade experiences. Maybe next year, when it's all old hat, I won't feel the need to drag you through every step of my horticultural experiences. Maybe. Maybe not. I plan on planting heirloom tomatoes and then? I'm sure I'll go camera-crazy for their lumps and bumps.

With so many tomatoes at my fingertips, I had high hopes to can my bounty. But after speaking with friends and family, I decided to forego the preserving kettle and sterilizing jars. Instead, I put my new peach-stuffed upright freezer to use. Both my cousin Donna and neighbour Elizabeth (who brought me those amazing black raspberries) insist that all I need to do is roast and freeze.

Okey-dokey.

So I roasted tomatoes, peeled off the skin, added a pinch of salt and popped them into the freezer in conveniently pre-measured freezer bags.

As an experiment, I put fresh basil, garlic and some red wine vinegar in one batch. Was this the right move? I'll let you know come winter.

How do you preserve your tomatoes? Any tricks I should know before I put away the last batch?

And be honest — am I the only one who gets attached to her plants? Or do all first-time growers feel sentimental about their crops?

Thursday, September 24, 2009

Moroccan-Inspired Nectarine and Plum Chicken

Nectarine-Plum-Chicken-1.jpg

I wish you could reproduce this recipe exactly as I made it. But you can't. Unless you mess up your preserves like I did.

A few weeks ago, I attempted a homemade mixed-fruit ketchup. But I was so busy "multitasking" I missed the small but crucial word "EACH" in the ingredient list. Instead of adding 2 cups EACH of peaches, apples, pears and plums, I used 2 cups peaches.

Sensing something was wrong, I reread the recipe more carefully and realized my mistake — too late. With only peaches on hand, I attempted to salvage the batch by upping the peach quota to cover the missing apples, pears and plums. No big deal. Fruit is fruit, right?

Not when it comes to preserves. Without the high-pectin apples and plums to provide body, the low-pectin peaches didn't stand a chance. The resulting "ketchup" was thin as tomato juice. Heinz has nothing to worry about from me.

So for two weeks, seven jars of sloppy, fruit-flavoured ketchup sat on my dining room table as I debated their fate. I couldn't give them away. And using the runny contents on burgers was out of the question. What didn't slide off the meat would turn the bun to mush.

But the other night, when I was stuck for what to make for dinner, Andrew suggested I pour my failed ketchup over chicken. Chicken. The mediocre solution to every culinary quandary.

As I considered his idea, I saw the nectarines and plums sitting on the counter. Hmm... Moroccan cooking often uses prunes, which are just dried plums. Add a bit of cumin, cinnamon and ...?

And it was the best chicken I've made in ages. THE BEST. Nothing mediocre about it. And all because I botched the ketchup.

Nectarine-Plum-Chicken-2.jpg

I was so pleased with the results, I tarted up the photo shoot. Don't for a minute think I served dinner with fresh plums nestled between chicken pieces. Nor did fresh-faced nectarines cheer from the sidelines. Nope, these fancy shots are pure eye candy.

Nectarine-Plum-Chicken-3.jpg

While I can't guarantee the results, I'm providing the recipe for inspirational rather than instructional purposes. There's no sense in crying over runny preserves. Not if there's chicken nearby.

Have you had any serendipitous dishes you wish to share? Any potential disasters turned positively delicious? Speak up. I'd love to hear it.

Moroccan-Inspired Nectarine and Plum Chicken

Printable recipe

Ingredients

  • 6 large chicken thighs, skinless, bone-in
  • 2 nectarines, chopped
  • 6 plums, chopped
  • 2 onions, sliced
  • 1 large clove garlic, minced
  • 1/2 tsp cinnamon
  • 1 tsp ground coriander
  • 2 tsp ground cumin
  • 1/2 tsp turmeric
  • 1 tbsp fresh ginger, grated
  • 2 tbsp fresh lemon juice
  • 2 cups tomato and peach ketchup or some tangy fruit sauce (not commercial ketchup!)
  • fresh cilantro, minced

Instructions

  1. Preheat oven to 350°F.
  2. In a large, heavy skillet, saute chicken thighs in their own fat. Brown for about 5 minutes a side until golden.
  3. Place chicken in a roasting pan.
  4. Sprinkle chicken with nectarines and plums.
  5. Using the same skillet you cooked the chicken in, saute onions in the chicken fat for about 3 minutes.
  6. Add garlic and ginger, saute for 2 more minutes.
  7. Add cinnamon, coriander, cumin, turmeric and lemon juice. Cook 2 more minutes or until onions are very soft.
  8. Spoon seasoned onions over chicken.
  9. Pour homemade ketchup over the entire dish.
  10. Bake uncovered for 45 minutes or until the chicken is cooked all the way through.
  11. Sprinkle with cilantro.
  12. Serve on rice or couscous.

Wednesday, September 23, 2009

Sage and Tomato Soup

Tomato-Sage-Soup-1.jpg

This blog has ruined me. Forever.

Just this week I realized what my family has been accusing me of for years is actually true. I am a food snob.

Not the Beluga-Caviar-or-Bust kind of food snob, but a food snob nonetheless. The facts are indisputable. I am a Fresh-or-Forget-It, Real-or-Reject-It kind of food snob.

I've been denying this allegation, preferring instead to call myself merely "discerning" or "discriminating". After all, I don't go weak in the knees for foie gras or pine for white truffle oil. I failed the Cheese or Font test (Thanks to Clare and Phil for sending me the link to this ego-crushing challenge), and couldn't care less about sushi.

But over the past three years, as I explored food for this blog, the culinary bar has crept ever higher. Without me even noticing. And this week I could no longer deny it.

My gastronomic reality check? Tomato and Sage Soup. I made it a lot in university as an antidote to my draughty apartment. And with the autumn nip in the air, I thought hot soup would be the perfect way to use up some of my self-replenishing tomatoes. And a bit of my rambunctious sage.

But when I pulled out the recipe — which I hadn't made since graduation — I was horrified to see it used no tomatoes whatsoever. None. Instead, my "homemade" tomato soup called for 3 cups of stock and a large tin of tomato paste.

How could this be?

Seems I, not the recipe, have changed. Sure, the Old Me made her own granola and yogurt, but she also bought bargain brand margarine and lived on popcorn when cramming for exams. The Old Me would have been slurping that cheap and convenient soup before the New Me was finished slicing the vine-ripe tomatoes. Much as the Old Me loved that soup, The New Me just couldn't bring herself to make, let alone blog about, tarted up tinned goods.

So it's official. I am a food snob.

And this blog is to blame.

With tomato and sage on the brain, I turned to John Bishop for inspiration. His book Fresh: Seasonal Recipes Made with Local Foods (Douglas & McIntyre, 2007) won Gold at last year's Canadian Culinary Book Awards. It contains a recipe for tomato soup complete with sage biscuits. Like my student version, it has sherry, onions and garlic, but the similarities end there.

Below is my variation of Bishop's blissful soup. Sue, it takes a lot longer to make than the slap-dash tomato-paste version. But while my taste buds have grown, so have my multi-tasking skills. While the tomatoes roasted, I answered emails. And as the soup gently simmered, I folded laundry. In the end? I got some work done and a pot of delicious soup as a reward.

My only complaint? This dish cries out for a hunk of aged cheddar and a thick slab of homemade bread. I had neither on hand. Just like when I was a student.

Tomato-Sage-Soup-s.jpg

Do you look over old recipes and cringe? How has your palate changed? Or am I the only one whose tastes have morphed?

Roasted Tomato and Sage Soup
Makes 4 servings

Printable Recipe

Ingredients

  • 2 pounds ripe tomatoes, halved
  • 1 medium onion, quartered
  • 2 cloves garlic, whole
  • 2 Tbsp olive oil or canola oil
  • sea salt
  • 3 cups chicken stock (or vegetable stock)
  • 1/3 cup dry sherry
  • 1 tbsp honey (or more to taste)
  • fresh ground black pepper
  • 10 sage leaves, roughly chopped

Optional Garnish

  • creme fraiche (see, I AM a food snob!) or cream

Instructions

  1. Preheat oven to 450°F. Line a roasting pan with the tomatoes, onion and garlic. Drizzle with oil and sprinkle with salt. Roast for 30 to 45 minutes or until cooked.
  2. Put roasted tomatoes, onions and garlic in a saucepan. Add stock, sherry and honey. Bring to a boil. Immediately reduce to a simmer and cook 30 minutes.
  3. Add sage leaves and allow to simmer 10 more minutes.
  4. Using an immersion blender, puree until smooth.
  5. Strain through a fine sieve to remove seeds and skins.
  6. Season with more salt if necessary and freshly ground black pepper.
  7. Garnish with creme fraiche or cream, if desired


Saturday, September 19, 2009

Out Out Damn Spam!

Thanks to Jill for suggesting I use this video! It sums up how I feel!

My apologies to Shakespeare, Monty Python and you.

Because of a recent spate of spam comments, I have activated the dreaded word verification function on my comments section. I hate to make it harder for you to post, but I despise links to Asian porn and knock-off handbags even more.

The move to the new blog platform is slated for October 1st. WordPress's spam filter eliminates the need for word verification or moderation, so it'll be business as usual at that time.

Sorry for the inconvenience. I hope this doesn't stop you from commenting. Reader response is a vital part of this blog. I couldn't do it without you, so please forgive the inconvenience for the next couple of weeks.

Thanks for understanding.

Charmian

Friday, September 18, 2009

Gazpacho Soup

You'll be happy to know all is forgiven. Seems I'm not the only one to have forgotten my sister's birthday. She read my blog post and called to say I had been keeping very good company in my neglect. Turns out one of her best friends and all of her co-workers were scrunched in the Bad Corner with me. The whole gang forgot her birthday. The irony? Robin works for the Alzheimer Society. Nuff said.

Moving onto today's topic. Soup. Colourful, isn't it?

Gazpacho-1.jpg

The tomatoes and opal basil are from my garden. I'm so darned pleased it's ridiculous. You'd think I'd given birth or cured cancer. But as I confessed earlier, it was nature, not me, that produced a stellar crop.

After a delicious 150-calorie gazpacho at Pret a Manger during my travels, I decided to make a batch myself. While researching recipes I found an amazing variety of opinions on the appropriate texture for this soup. Some pureed everything until smooth, others simply diced the vegetables and tossed it all in tomato juice. A third camp did a little of each.

So, here's my recipe. Make it as chunky or smooth as you like. Being a middle child, I took the middle road and pureed only half the ingredients.

How do you like your gazpacho?


Gazpacho-tilt.jpg

Gazpacho Soup

Printable recipe

Ingredients

  • 2 cups fresh tomatoes, peeled and diced
  • 2 cups English cucumber, diced
  • 1/2 red pepper, diced
  • 1/2 yellow pepper, diced
  • 1 jalapeno pepper, minced
  • 2 cloves garlic, crushed
  • 1/2 red onion, minced
  • 1 tbsp olive oil
  • 2 tbsp red wine
  • 1 tbsp lemon juice
  • 1 tbsp lime juice
  • 1 tbsp sugar or honey
  • 4 cups low-sodium tomato juice
  • 1/4 tbsp fresh herbs, finely minced (cilantro OR basil OR dill - or any combination)
  • salt and pepper to taste

Garnish

  • sour cream (optional)

Instructions

For chunky soup

  1. Combine all the ingredients.
  2. Season to taste.
  3. Chill at least 2 hours before serving with a dollop of sour cream.

For semi- chunky soup

  1. Set aside half the tomatoes, half the cucumber and all of the yellow pepper.
  2. In batches, puree the remaining ingredients in a blender.
  3. Mix set aside vegetables into the pureed mixture.
  4. Season to taste.
  5. Chill at least 2 hours before serving with a dollop of sour cream.

For smooth soup

  1. In batches, puree all the ingredients in a blender (you can use a whole red pepper and omit the yellow for more intensely red soup).
  2. Season to taste.
  3. Chill at least 2 hours before serving with a dollop of sour cream.

Thursday, September 17, 2009

Dutch Chocolate Cake Gets Tarted Up

Dutch-Chocolate-Cake-1.jpg

It's official. I'm a Bad Sister. Capital letters earned.

This post is a public apology to my sister Robin with the hopes that sincere groveling and pretty pictures illustrating the possible Make-Up Cake will help.

My blunder? I forgot my sister's birthday. Totally and completely.

Now, forgetting a birthday is forgivable. But when the birthday girl calls you ON HER BIRTHDAY and you spend the entire time yakking about your recent trip and the cats? Well, that's Bad Sister Bad.

And when she mentions that her husband is taking her out to dinner and you STILL don't clue in? That's IQ of a Kumquat Bad.

And when her birthday present — which you bought on the trip you are so busy recounting in great detail — is sitting on the coffee table right in front of you? That's Call the Neurologist, You Need a Brain Scan Bad.

So, Robin, your Brain Damaged sister is sorry. Very, very sorry. When I eventually get your present to you, I will also bring your Belated Birthday Cake of Choice. On the outside it could look like this...

Dutch-Chocolate-Cake-2.jpg

And the inside? Something like this...

Dutch-Chocolate-Cake-Slice.jpg

I know it's not pretty, but by time the liqueur and cream have worked their magic, the cake's so drunk it staggers when you slice it.

Does this kind of culinary suck-up work for you? I hope so, because it's all I've got.

For those outside the family, there are shots of a typical Christie Birthday Cake. While the variations are almost endless, each made-to-order version starts with the same simple Dutch chocolate cake. On its own the cake is pretty ordinary. If you want a great chocolate cake, there are better recipes out there. But this has the right texture to stand up to the booze. And once laced with liqueur and slathered with cream? This unassuming cake is elevated to the status of torte. (Okay technically a torte has little or no flour, but sometimes you need a fancier word than "cake". "Gateau" would do...)

Hankering for Black Forest Torte? Just use Kirsch and cherries. Or does Gateau a l'Orange turn you on? Triple Sec, Cointreau, Grand Marnier or Sabre all work well with mandarin orange slices. Over the years we've gobbled peppermint, mocha, hazelnut and almond variations.

My favourite is Chocolate Raspberry, but if I ever find a ginger liqueur, I'll give a candied ginger version a try.

What flavour would you pair with this? Or would it take more than a cake to make up for forgetting your birthday?


Dutch-Chocolate-Cake-3.jpg

Dutch Chocolate Cake with a Christie Twist

Makes 2 9-inch round cakes. Recipe can be halved.

Printable recipe

Ingredients for cake

  • 4 squares unsweetened chocolate
  • 1 cup butter
  • 2 cups white sugar
  • 1 cup milk
  • 1 1/2 cup all-purpose flour
  • 4 tsp baking powder
  • 4 eggs
  • 2 tsp vanilla
  • 1/2 tsp salt

Ingredients for Torte

  • 2 cups whipping cream (more if you want to put cream on the sides)
  • 2 tbsp sugar (or to taste)
  • liqueur of choice
  • fruit, nuts or other matching flavour item of choice
  • semi-sweet chocolate, grated

Instructions for Cake
  1. Preheat oven to 350F.
  2. Grease and line two 9-inch round pans.
  3. Melt chocolate with butter.
  4. Add all ingredients together at once and beat until smooth.
  5. Pour batter into pans, making the cakes as even as possible. Push batter to the edges of the pan so the cake will remain relatively flat when it rises during baking.
  6. Bake for 30 minutes or until a cake tester inserted into the middle comes out clean.

Instructions for Assembling the Torte
  1. Allow the cakes to cool thoroughly before handling them.
  2. Whip the cream.
  3. Slice the cakes in half horizontally.
  4. Place one layer of cake on the platter or stand you will be serving it on. Drizzle the layer of cake with liqueur.
  5. Spread with a layer of cream, dot with fruit/nuts/filling of choice and sprinkle with grated chocolate.
  6. Repeat steps 4 and 5 with remaining layers of cake.
  7. If there is enough whipped cream left, use it to ice the sides. If not, you can present an open-sided cake. It is equally impressive.
  8. Cover and refrigerate a couple of hours (or overnight).

Tuesday, September 15, 2009

Reader Question: The Cost of Eating Local

RedCarrots.jpg

A while ago a reader emailed me one of the best questions I've received in a long time. She voiced the frustration we all feel trying to align our ideals with our pocket books when she wrote:

I live in the Niagara Region of Ontario, one of, if not Canada's largest fruit producer, and I have always tried to buy Canadian, and not just for food. However, I do get annoyed when I go to the local market and find that our Ontario strawberries are $5.99 a container and the Californian ones are only $3.99 (same quantity) and they are actually firmer and sweeter then the locally grown ones. Which strawberries would you buy? On a fixed income I have little choice if I want to eat fresh.

In Niagara we are surrounded by orchards of cherries, peaches, plums, and fields of strawberries, corn, tomatoes, etc. yet we pay as much or more at our road side stands (straight from orchards and fields) as we pay for imported produce in the grocery store. My question is WHY? Is that necessity or greed?

I wish someone could give me a good answer…


Well, frustrated reader, while we can blame the poor strawberry crop on the wet weather, the pricing is a different matter. And it's not greed on the part of our local farmers. Many of them haven't seen a raise in more than a decade.

The answer below, which summarizes the situation very concisely, comes via Dana McCauley. I won't go into details, but Dana learned the answer to my question while interviewing Paul Sawtell and Grace Mandarano of 100km Foods Inc., and in a trademark gesture of generosity, she passes their excellent answer onto you.

Pay it forward to Dana by popping by her blog. Today she's looking at innovative and socially conscious companies, like 100km Foods, that are making it easier for chefs to buy local crops.

But back to the question of why local foods are often more expensive. While the topic could fill a book, Sawtell's answer (emphases mine) sums it up in one paragraph:

The fact that on average, local food costs more than imported foods from thousands of kilometres away speaks to a much larger geopolitical issue. Largely driven by cheap labour and cheap transportation costs, and in many cases massive surpluses, export dumping and government subsidies, it still baffles me that products can travel thousands of kilometres and remain cheaper than something produced literally down the road in some cases. This is not a comment on how expensive local food is, it is more my comment on how cheap, and artificially cheap, imported food can be. And sadly, cheap food is what North American consumers have come to expect.


Now before you think I'm just sitting back and letting Dana do all the work, I did speak with Sawtell myself. In a follow-up call, I asked him how we consumers could bring the costs down. He said food follows the standard economical model of supply and demand. Abundance lowers price. When there's a steady demand for locally grown crops, the price will go down.

But will locally grown, small crops ever be as inexpensive as government-subsidized foreign food grown on a large scale and picked by cheap labour? No, but you can narrow the price gap buying from local farmers.

How can you do this? Two simple ways include heading down to the local Farmers' Markets or buying a share of Community Supported Agriculture (CSA). Not sure where to start? Here are some links that might interest you.


Do you support local farmers? If so, how? If not, what (other than price) stumbling blocks do you encounter?

[Get Copyright Permissions] Click here for copyright permissions!
Copyright 2008 Charmian Christie